Crispy Grilled Campfire Potato Wedges
Smoky, crispy, and buttery! These campfire potato wedges are the ultimate outdoor side dish—perfectly charred outside and fluffy inside.
or read on for step-by-step instructions with photos

The Best Camping Potatoes
It’s time for baked potatoes to share the spotlight. Sure, you can toss a whole foil-wrapped potato by the coals for a simple camping meal, but if you want something a little more special, these grilled potato wedges are the way to go.
Crispy, buttery, and fluffy inside. This easy technique delivers perfect results every time. It takes a little extra effort, but it’s still simple enough for campfire cooking. These crispy grilled wedges are the ultimate side for BBQs, camping, or backyard fire pits.
What makes this recipe different?
Use the right potatoes: Idaho potatoes have a high starch content, making them perfect for crispy edges and a fluffy interior.
Extra crispy texture: Boiling the potatoes before grilling helps to create a crunchy, golden-brown crust.
Minimal ingredients, big flavor: Just potatoes, butter, salt, and pepper come together for incredibly delicious results.
Versatile cooking options: No campfire? No problem! You can also grill, bake, or pan-sear them at home.
What’s Ahead in This Recipe?
Top Tips: How to get the best texture and my favorite tools for campfire cooking.
Serving Ideas: The best dips and proteins to pair with these potato wedges.
Substitutions: Options for different potatoes, seasonings, and cooking methods.
Storage & Reheating: How to keep leftovers fresh in your fridge or cooler, and how to rehydrate and re-crisp them later.
FAQs: Everything you need to know, including why Idaho potatoes work so well!
But first, let me walk you through how to make these grilled potato wedges step-by-step.
Let’s fire up that grill!

What you’ll need
Ingredients
2 Idaho potatoes (russet or baking potatoes)
4 tablespoons butter
salt & pepper, to taste
Equipment
Pot for boiling potatoes
Grill & tongs
Knife & cutting board
Tray or aluminum foil (for resting potatoes)
Makes: 4 portions (4 wedges each)
Prep: 10 min Cook: 20 min
How to make it
Step 1
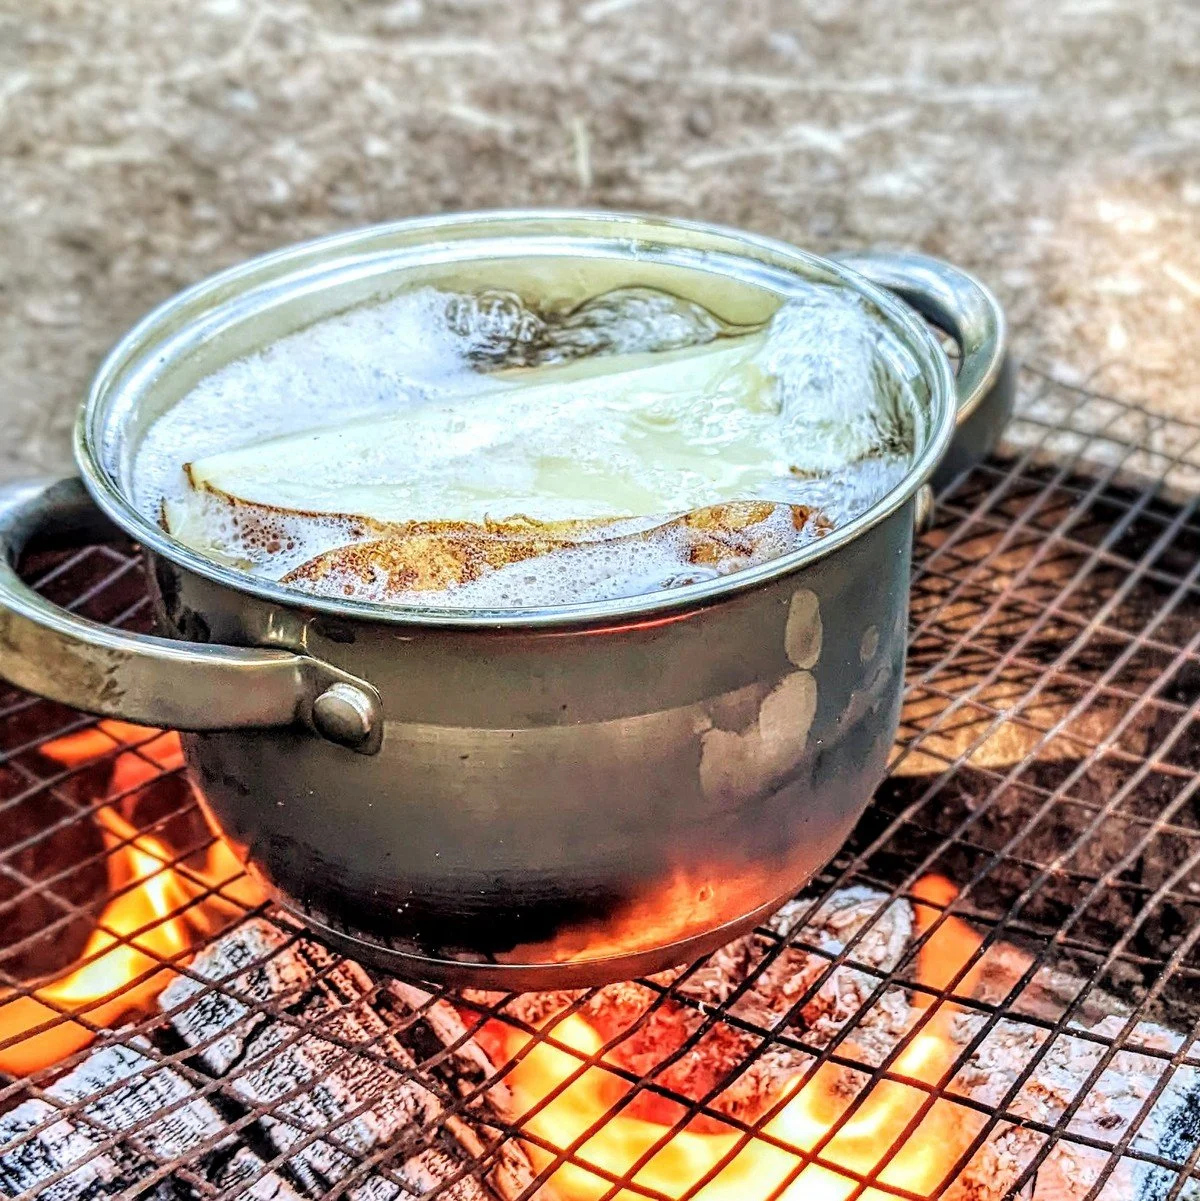
Prep and boil potatoes.
Cut the potatoes into wedges, then place them in a pot. Cover potatoes with cold water, add a pinch of salt, and place on high heat to bring to a boil. Use a lid to get the water boiling a little faster if you have one.
The potatoes I used were quite large, so I got 8 wedges out of each potato.


Step 2
Cook until just tender, then drain.
Once boiling, remove the lid and cook the potatoes until they’re just shy of tender—about 8 minutes.
Check doneness by poking the thickest part of a wedge with a fork or knife. It should slide off easily when lifted. Carefully drain and place them on a flat surface like a cutting board, tray, or aluminum foil to let them steam and dry slightly.
I drained mine by holding the lid against the pot while pouring out the water, but you can also use tongs, a spoon, or a colander if you have one.
💡 Pro Tip: Be careful not to overcook the potatoes or they’ll fall apart on the grill. If that happens, just switch gears and make mashed potatoes instead!

Step 3
Season the potatoes.
Using the same pot or a bowl, toss the potatoes with butter, salt, and pepper until well coated. It’s okay if some of them break in half, but try to be gentle.
I seasoned them in batches in my small pot before placing them on aluminum foil. The residual heat helped melt the butter, but if they start to cool, melt the butter in the pot first before tossing. If you have a large enough bowl, you can season them all at once.


Step 4
Grill until crispy.
Place the wedges on a hot grill or cast-iron pan and cook until slightly charred and crispy on the outside.
I grilled mine in batches since my grill pan only fit 6 wedges at a time. Once done, I placed the grilled wedges back onto the same sheet of aluminum foil until they were all ready to serve.


Step 5
Serve and enjoy.
These wedges are delicious on their own, but if you’re serving them as a side, wrap them in aluminum foil and set them aside until the rest of your meal is ready. You can reheat them in their foil package just before serving.


I may earn a small commission from some of the links on this page if you make a purchase, at no extra cost to you. I only recommend products I genuinely believe in and already have or would purchase myself.
My Tips for Perfect Campfire Potato Wedges
Cut evenly for even cooking: Try to cut the potato wedges as evenly as possible so they cook at the same rate. Uneven wedges may end up undercooked inside or too soft to grill.
Don’t skip the parboil: Boiling the potatoes not only softens the inside for faster grilling but also removes excess moisture. Some of the potatoes' natural water content is released during boiling, and letting them steam off after draining removes even more moisture from the surface—both key for getting crispy results on the grill.
Get the grill hot before adding potatoes: A hot grill ensures nice char marks and prevents sticking.
Don’t overcrowd the grill: Cook in batches if needed. Overcrowding lowers the temperature and prevents a good sear.
Use the right tools: Using a grill basket for grilling the potatoes can be very helpful, ensuring nothing slips through the grates. I personally use one that’s very similar to this Weber grill basket on amazon.
Want more campfire tool recommendations? Check out my full article on the best camping cooking gear.
Serving Suggestions
Sauces & Dips: Roasted jalapeño mayo, easy stick blender hollandaise, maple butter buffalo sauce, tangy & herby zhoug sauce, creamy Caesar dip, or just classic ketchup.
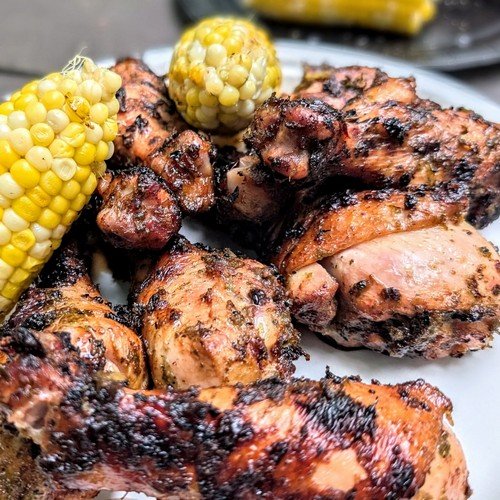
Proteins & Sandwiches: Pair with grilled lamb or steak, Jamaican jerk chicken, BBQ pork ribs, pickle-brined chicken thighs, fully loaded Chicago style char dogs, easy smash burger tacos, or a classic muffaletta sandwich.
Complementary Veggies: Serve alongside grilled corn on the cob, marinated Mediterranean-style veggies, creamy campfire polenta, roasted Brussels with bacon fat, or a fresh chopped salad.
Repurpose Leftovers:
Loaded Tex-Mex Potato Wedges: Top with sour cream, zesty guacamole, pico de gallo salsa, and quick-pickled red onions.
Chili Cheese Potato Wedges: Layer with chunky beef chili, cheese sauce, pickled jalapenos, and scallions.
Potato Wedge Poutine: Smother with cheese curds and classic brown gravy.
Breakfast Hash: Dice potato wedges and add to a skillet with brisket, onions, and peppers. Top with a fried egg and homemade hollandaise sauce for a decadent touch.
Substitutions
Potatoes: Idaho (aka russet or baking potatoes) work best for a crispy outer layer, but you can use Yukon Gold for a creamier texture or sweet potatoes for a different flavor altogether.
Fat: Swap regular butter for brown butter to add a nutty flavor.
For a dairy-free alternative, try rendered chicken fat, duck fat, or bacon fat.
To make them vegan, use a cooking oil such as olive oil, avocado oil, or coconut oil.
Seasonings: Instead of just salt and pepper, try adding smoked paprika, garlic powder, or Cajun seasoning for extra flavor.
Cooking Method:
To cook in a cast-iron skillet, heat over medium-high and cook the wedges, flipping occasionally, until golden brown and crispy.
To bake in the oven, spread the wedges on a parchment-lined baking sheet and bake at 450°F for 25-30 minutes, flipping halfway through for even browning.
Storage
Cooler (Camping Storage): Store potato wedges in an airtight container or zip-top bag and keep them in a well-packed cooler with ice packs. They’ll stay fresh for up to 2 days. Drain excess water from melted ice regularly to prevent moisture buildup.
Fridge: If at home, store leftover wedges for up to 4 days. Let them cool completely before sealing to prevent sogginess.
Freezer: Freeze wedges in a single layer on a baking sheet until solid, then transfer to a freezer-safe bag. They’ll keep for up to 3 months.
Reheating:
Campfire or Grill: Lightly toss with melted butter or oil and grill over a hot fire until heated through and crispy.
Oven or Air Fryer (Best for Crispiness):
From the fridge: Reheat at 400°F for 8-10 minutes, flipping halfway, until crispy.
From frozen: No need to thaw! Bake at 425°F for 15-20 minutes, flipping halfway. In the air fryer, cook at 400°F for 10-12 minutes, flipping halfway.
Stovetop: Heat in a dry cast-iron skillet over medium heat, flipping occasionally, until warmed through and crispy.
Add a little water: To rehydrate dry potato wedges, lightly mist with water before heating using one of the above methods. Check out my full guide on how to revive stale fries with water for step-by-step instructions.
Avoid Microwaving: This makes the wedges soft and mealy instead of crispy.

FAQs
What are Idaho potatoes?
Also known as russet or baking potatoes, Idaho potatoes are starchier than other varieties, making them ideal for baking, mashing, or frying.
From my time working in restaurants, I’ve learned that pro chefs specifically choose these for fries because their starchiness creates a crispy exterior and fluffy interior.
What are the best potatoes for potato wedges?
Idaho potatoes have a high starch and low moisture content, making them ideal for crispy edges and a soft, fluffy inside. Their drier texture also helps them absorb butter and seasonings better than waxy potatoes.
That being said, Yukon Gold, baby potatoes, or even sweet potatoes can be used, each offering a slightly different texture and flavor. Yukon Golds are creamier, baby potatoes are small and tender, and sweet potatoes provide a naturally sweet, softer bite.
What’s the best way to cut potato wedges?
Start by cutting the potato in half lengthwise. Place the cut side down, then slice each half in half again lengthwise. If the wedges are still too thick, cut them once more until you reach the desired size.
For even cooking, try to keep all wedges as uniform as possible in thickness.
Why do you need to boil potatoes before grilling?
Tenderness: Parboiling ensures the potatoes are already tender, so when grilling, you only need to focus on getting a nice crust rather than worrying about whether they’re cooked through.
Remove excess moisture: Boiling also releases some of the potatoes' natural moisture, and letting them steam off after draining helps even more excess moisture evaporate. This drying effect allows the starches to caramelize properly on the grill, leading to a crispier, more golden-brown crust.
Seasoning: Boiling in salted water helps season the potatoes from the inside out, giving them more flavor than just seasoning the outside.
If you skip this step, it's not the end of the world—you’ll just need to grill the potatoes over lower heat for a longer time to ensure they cook through without burning. However, they may not develop the same crispy, crunchy crust.
Why are my potato wedges not crispy?
Several things can cause soggy wedges:
Too much moisture: Make sure to drain and steam them off before grilling.
Overcrowding the grill: Give them space so they crisp instead of steaming.
Grill not hot enough: Preheat your grill properly to get a good sear.
Not enough fat: A proper coating of butter or oil helps transfer heat from the grill, promotes crisping, and prevents sticking.
Can I cook potato wedges in aluminum foil?
Yes, but I try to avoid cooking in foil as much as possible since prolonged high-heat exposure can leach aluminum into your food. Instead, use foil for storage or a quick reheat, but avoid cooking wedges in it over direct heat.
For the best results, cook the wedges directly on a stainless steel grill grate or in a cast-iron pan. If using baby potatoes, try skewering them before grilling for an easy, mess-free option.
What’s the best seasoning for grilled potato wedges?
Classic salt and pepper always works, but for extra flavor, try:
Smoky: Smoked paprika, chipotle powder, chili powder, or Montreal steak spice.
Herby: Dried oregano, rosemary, basil, or parsley, plus garlic powder or onion powder.
Zesty: Lemon-pepper seasoning, Italian lemon & herb spice blend, or add some fresh citrus zest.
That’s it, enjoy!
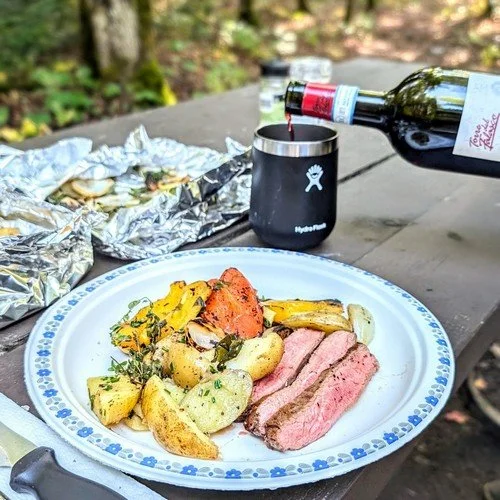
We were camping through Idaho, so naturally, I wanted to eat some Idaho potatoes. These wedges turned out crispy and fluffy, with the bonus of a little campfire char. It was completely worth the extra effort while camping. If you’re not camping, this is still a great recipe for grilling on a barbecue, pan-searing in a cast-iron pan, or baking in the oven.
I served these potato wedges with grilled steak and zucchini, and it quickly became one of the best meals we’ve had while camping. A squeeze of lemon brought the whole dish together, balancing the butteriness of the potatoes with a fresh, tangy finish.
These potato wedges were a simple yet flavorful break from the usual campfire hot dogs and burgers. Whether you’re out in the woods or grilling at home, this recipe is an easy way to elevate your meal!
Summary

Buttery Grilled Camping Potato Wedges Recipe
These crispy buttered campfire potato wedges are grilled to perfection—fluffy inside, charred outside, and packed with smoky flavor. The ultimate campfire side dish!
Makes: 4 portions (4 wedges each)
Prep: 10 min Cook: 20 min
Ingredients
2 Idaho potatoes (russet or baking potatoes)
4 tablespoons butter
salt & pepper, to taste
Instructions
Prepare potatoes. Cut into wedges and place in a pot with cold water and salt, then bring to a boil.
Cook until tender. Boil potatoes until almost tender, about 8 minutes. Check doneness with a fork or knife. Carefully drain and let potatoes steam off excess moisture on a flat surface.
Season. Toss potatoes with butter, salt, and pepper in the pot or a bowl.
Grill. Cook on a hot grill until crispy and slightly charred.
Serve. Enjoy as a standalone snack or as a side dish. If serving later, wrap in foil and reheat before serving.
Top Tips
Don’t skip the parboil: Boiling softens the inside and helps the wedges crisp up on the grill.
Swap the fat for extra flavor: Brown butter adds nuttiness, bacon fat adds smokiness, and coconut oil brings that signature coconut flavor.
Keep leftovers fresh in a cooler: Store in an airtight container or zip-top bag with ice packs for up to two days. Drain excess water regularly to avoid moisture build-up.
Further reading: Check out my tips, serving suggestions, substitutions, storage, and FAQs for more!
Did you try these crispy buttered campfire potato wedges? Let me know how they turned out! Leave a comment below or tag me on Instagram @onecreativecook—I’d love to see your take on them.
Enjoy!
More Camping Recipes You’ll Love
Quick marinade for meat or veggies: A simple, flavor-packed marinade that works for steak, chicken, or veggies—perfect for campfire grilling.
Cheesy polenta with fresh summer corn: Creamy, buttery polenta loaded with sweet corn and melty cheese—an easy, comforting side dish.
Cast-iron bacon fat Brussels sprouts: Caramelized Brussels sprouts, mushrooms, and onions cooked in bacon fat for smoky, savory goodness.
Pork ribs with Carolina-style vinegar BBQ sauce: Tender, smoky ribs with a tangy, vinegar-based sauce that cuts through the meaty richness.
Easy grilled spaghetti squash: A simple way to grill spaghetti squash until tender and slightly charred—healthy, hearty, and perfect for crisp-weather autumn camping.
How to grill corn in the husk: A foolproof method that skips soaking in water or wrapping in foil—just steam the corn right in its husk for maximum flavor.
How to make coffee in the Delter coffee press: A step-by-step guide to brewing a smooth, rich cup of coffee with the Delter Press—perfect for kickstarting your camping mornings!