How to Cook Over a Fire: Tips from a Pro Chef
Learn the best chef-approved campfire cooking techniques with this easy guide—from fire-building and heat control to creative camping meal ideas!

Easy Campfire Cooking Techniques for Beginners
Cooking over a fire doesn’t have to be complicated. A bit of practice with the right techniques can even lead to some pretty impressive dishes. Camping food can go way beyond foil packets and roasted marshmallows!
Use my chef-tested tips to make live fire cooking feel easy—no stress, and only basic gear required. In this guide, I’ll walk you through the beginner-friendly techniques I use myself, so you can start cooking over a fire with confidence.
Why Cooking Over a Fire is Worth It
Deep smoky flavor: Fire adds rich, complex flavor you just can’t get at home.
No bulky gear required: Skip the camp stove and portable BBQ—just bring essentials like a grill rack and tongs.
It’s fun and satisfying: There’s something primal and joyful about cooking over flames, and with a little know-how, it can be totally stress-free.
What’s Ahead in This Guide
Fire-building tips: How to start a fire for steady, reliable heat.
Basic campfire cooking setup: My go-to gear and what to do if your site doesn’t have a fire pit with a built-in grill rack.
Controlling the heat like a pro: Learn to use heat zones, adjust flames, and cook things in the right order.
Creative camping meal ideas: What to cook over the fire (beyond hot dogs and burgers).
FAQs: Get answers to common questions—like what meals are easiest for beginners and what type of wood is best for cooking fires.
By the end of this guide, you’ll be ready to build a fire, manage the heat, and cook like a pro on your next outdoor adventure.
🔥Ready to light the fire? Let’s go!

How to Build a Cooking Fire Like a Pro
Campfire Safety
A safe fire setup is the first step to great campfire cooking. With wildfire risk growing every year, you’ll want to make sure you’re doing it right before you get started.
Use designated fire pits: Always light fires in established fire rings or campground fire pits. If you’re in the backcountry or there’s no fire pit available, follow Leave No Trace principles and check local fire regulations first.
Clear the area: Remove any flammable materials like dry leaves or overhanging branches within a 10-foot radius of the fire pit.
Never leave it unattended: Always have someone nearby and keep water or a shovel close in case you need to put it out quickly.
Extinguish completely: When done, douse the fire with water until it’s fully out.
Choosing the Right Fire Structure
Let’s start with the foundation. There are a few ways to build a fire, but I usually go with either a teepee or log cabin style, depending on what I’m cooking.
Teepee style: I use this mostly for boiling water, usually for coffee in the morning. The narrow, vertical shape creates a quick, hot fire that shoots up to a central point, perfect for setting a pot or kettle over it to get water boiling fast.
Log cabin style: This is my go-to for actual cooking. It creates steady, even heat and burns down into a glowing bed of coals, ideal for grilling, pan cooking, or setting up a grill grate. It also forms a square-shaped fire base, which gives you a wider, more even surface for cooking over.

Helpful Tools for Building a Fire
These tools help get your fire blazing hot, fast. You don’t need them, but since I added these to my setup, I honestly can’t imagine going back.
Bellows: Manual or electric, a bellows is incredibly helpful for stoking the fire in its early stages. Air is a critical ingredient for building heat, and a good blast of oxygen can get your fire roaring in seconds.
I use an electric bellows (like in the photo above), but a manual one or even something simple like a cardboard box or plastic bin lid can do the trick to fan the flames.
Fire tongs: Once your fire is going, you’ll probably need to move logs around. Fire tongs make that effortless. They let you grab and reposition burning wood with precision, which is key for managing heat zones.
Before the fire tongs, I used to use two random sticks from the woods at the campsite... no idea why I suffered through that for so long 😅.
Building a Log Cabin Fire for Cooking
Step 1: Prep Your Base from Small (Tinder) to Big (Kindling)
Start by placing a fire starter in the center of your fire pit. This could be one of the wood shaving starters that often come with a bag of firewood, or something natural like crumpled newspaper, wine corks, or dry pine cones. Then stack small, dry kindling like twigs over the fire starter in a crisscross pattern, followed by a few thin sticks or split wood. This is your ignition zone—where your fire will take off.
💡 Pro Tip: Before you leave home, pack a small bag of materials you can use to start your fire. Toilet paper or paper towel tubes, an egg carton, paper scraps, and even pistachio shells all work great (and add flavor. For this fire, we used crumpled newspaper, wine corks, and a handful of pistachio shells left over from snacking.


Step 2: Build the Log Cabin Structure
Stack two thick logs parallel to each other on either side of your kindling. Then lay two more logs across the top to form a square, like a log cabin. Repeat to build 2–3 layers, leaving enough space in the center for air to flow.
Add more fire starters like crumpled paper, dry leaves, or pistachio shells between the logs as you go—this helps the fire catch from the inside out. Since the fire needs sufficient air to get going, don’t pack it too tightly. To finish, place one more log across the top in the center.


Step 3: Light and Stoke the Fire
Use a long lighter or match to ignite the paper from underneath. Once the fire catches, fan the flames to feed oxygen to the base and get the fire climbing. I used an electric bellows here, which makes this step fast and effortless—but you can just fan the flames with whatever you’ve got on hand.
💡 Pro Tip: I like to wedge my electric bellows into the holes in the side of the fire pit with a few pieces of wood so it stays put at a good angle and keeps fanning the flames hands-free through the vent. Just keep an eye on it once the fire really gets going, those plastic parts can melt if they’re too close to the heat!


Step 4: Let the Fire Burn Down
Once your fire is burning steadily, you can stop fanning the flames and let it burn down to build up a solid core of heat. As the fire works its way through the stack, I like to rotate the top logs with fire tongs to help them char evenly and burn a little more quickly.
You’ll know the fire is ready when the bottom logs are blackened and starting to crumble into glowing red coals, while the top logs are still holding their shape but burning steadily.
You don’t need to wait for a full bed of coals to start cooking. This stage, with hot embers below and steady flame above, is ideal for high-heat grilling and pan cooking. More on how to control that heat below.


Building a Teepee Fire for Boiling Water
For quick jobs like boiling water or heating soup, a teepee-style fire is the way to go.
Start by leaning kindling and small logs together in a cone-shaped structure, leaving space in the center for air and some tinder like newspaper. Light from the bottom, and as it burns, flames will shoot upward toward a central point, perfect for getting a pot or kettle hot in a hurry.
💡Pro Tip: If your fire pit has a built-in grate, lean the logs toward one side or corner under the grate. This makes balancing the teepee easier and channels heat directly upward beneath a pot or kettle.

Essential Gear for a Simple Fire Cooking Setup
Using a Grill Grate
Before you can start cooking, you’ll need something to set your food or pan above the flames. A grill grate is ideal for this, whether you’re grilling or using it to hold pots and pans above the fire.
Most state or provincial campground fire pits come with a built-in swing-out grill grate. Choosing a site with one of these will make your life way easier, especially if you’re just starting out.
But if your fire pit doesn’t have a grate, don’t worry. You’ve still got options:
Bring a portable fire-safe grill rack or a tripod grill
Cook directly in the coals with a Dutch oven or cast-iron pot
Use campfire forks or long skewers to grill over open flames
💡 Note on built-in grates: These are usually rusty, dirty, and definitely not food-safe. Don’t cook directly on them. Instead, pack one or two essential pieces of cookware, like a grill basket or cast-iron pan, to cook your food safely.

My Go-To Campfire Cooking Gear
This is the quick list of the core cooking gear I actually use at the fire—just the essentials for grilling, boiling, and pan-searing. For a deeper look at everything I bring, like my favorite tongs, heat-resistant gloves, electric bellows, and more, check out my full article on the best open fire cooking tools.
Grill Rack (or Basket)
If you’re grilling over a built-in grill grate, you’ll definitely want a simple grill rack so you can grill food safely without touching the dirty grate.
I use a stainless steel grill basket with tapered edges and round holes to help keep smaller items—like mushrooms, sliced onions, or sausages—from rolling into the fire (a tragedy I hope you never experience). It also works great for larger cuts like chicken or steak.
In a pinch, you can even bring the grill rack from your home BBQ. I did that for years before upgrading to this basket.

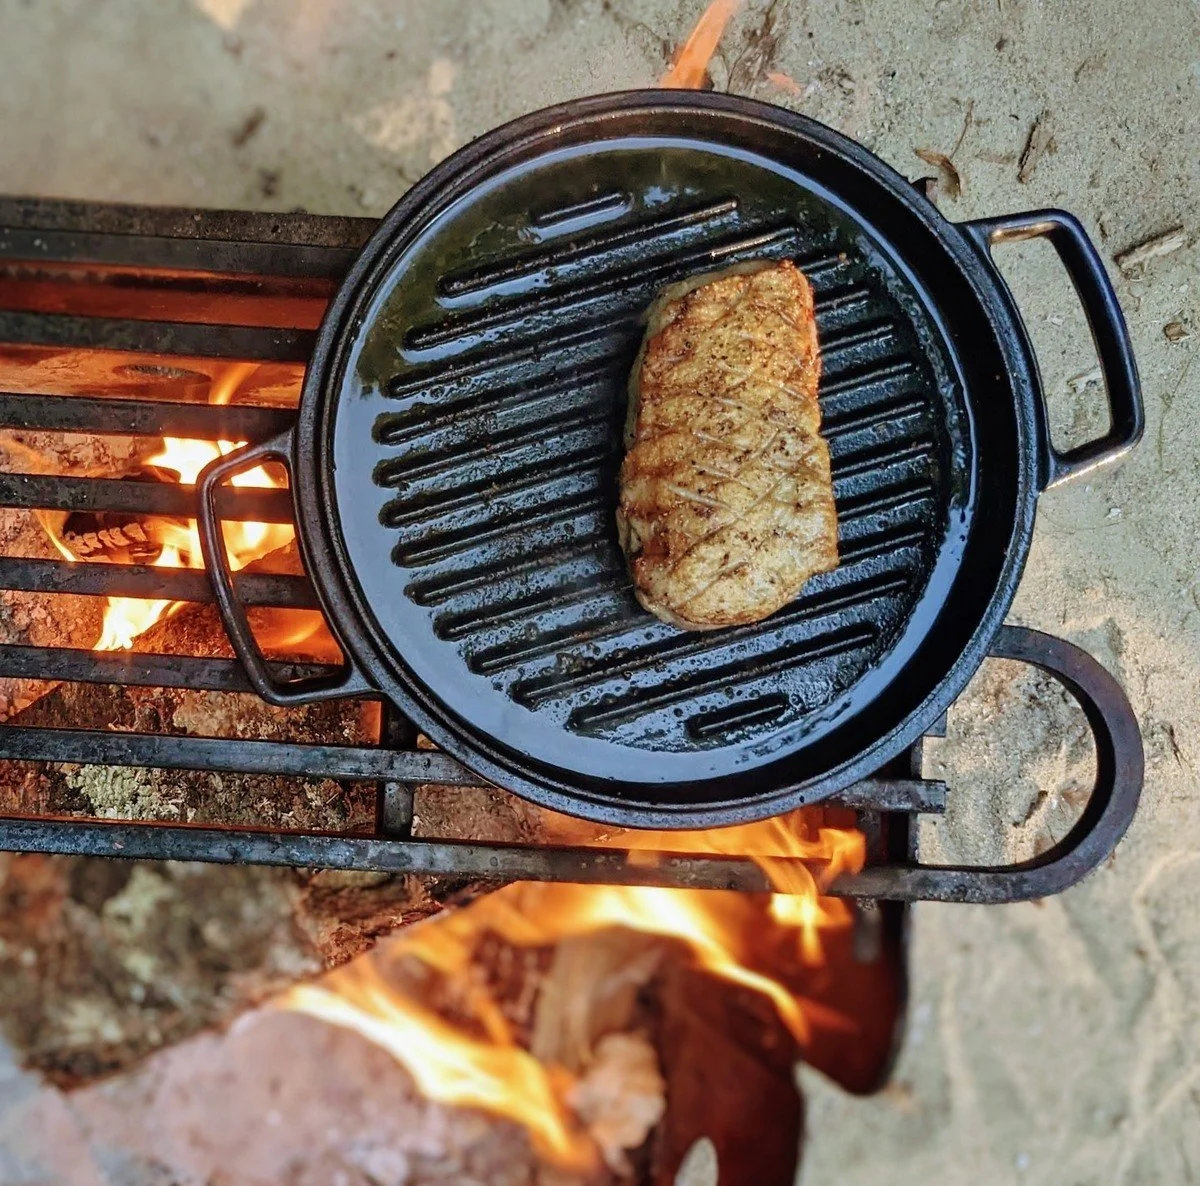
Cast-Iron Skillet
Great for anything that can’t be grilled directly over the fire—like fatty meats, eggs, saucy dishes, or delicate veggies.
We don’t usually do big breakfasts or eggs when camping, so I pack a cast-iron grill pan instead of a flat skillet. It’s great for grilled cheese, blistered tomatoes, pan-roasted Brussels sprouts, or even seared duck breast.
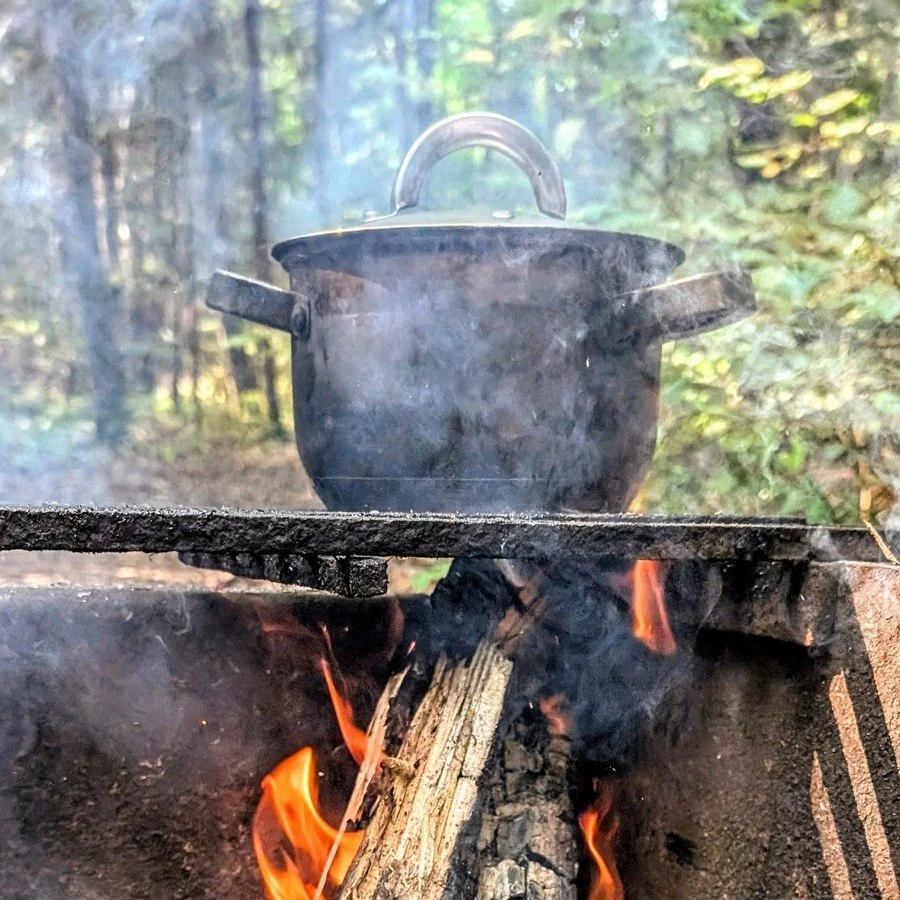
Small Pot
Essential for boiling water, making coffee, or heating soup.
A kettle also works, but I prefer a small lidded pot that doubles for cooking things like one-pot pasta, creamy polenta, or boiled potatoes.
☕Coffee Tip: If you’re into brewed coffee over instant, check out my Delter Coffee Press guide—it’s our favorite way to get a real cup of coffee at camp.

Optional Fire-Friendly Gear
You can cook almost anything with just the three essentials above—grilling, boiling, and pan-searing are all doable, especially if your fire pit has a built-in grill grate.
But if your site doesn’t have a built-in grate (or you just want to expand your collection), these tools make it easier to cook directly over the flames or right in the coals:
Extendable campfire forks: Great for roasting marshmallows and hot dogs, but also useful for veggies or fruit. (Wooden sticks from the forest work too!)
Dutch oven: Basically, a mini oven you place right in the coals. Great for baked meals like enchiladas, stews, cornbread, or fruit cobbler.
Pie iron: Perfect for toasted sandwiches or handheld desserts—crispy edges, gooey centers, and all the fun of fireside cooking.
What About Foil for Campfire Cooking?
Foil-packet meals are super popular for camping, and I totally get the appeal—they’re convenient, hands-off, and easy to prep ahead.
That said, I try to avoid using foil for cooking directly over fire. Aluminum can leach into food when exposed to high heat or acidic ingredients. Plus, food just tastes better when it’s grilled or cooked right over the flames.
Instead, I prefer to use foil for low or no-heat tasks—like resting meat or keeping veggies warm. The only time I cook in foil is for something like slow-cooked ribs with gentle heat, and even then, the ribs could be wrapped in parchment or butcher paper first to avoid direct contact with the foil.
Bottom line: It’s fine once in a while, but I usually stick to cast iron or stainless steel when I can.

Mastering Campfire Heat Like a Chef
How to Adjust the Heat for a Wood-burning Fire
Campfire heat is dynamic, but you can shape it to your needs with a few simple techniques:
Add logs to raise the heat: If your fire isn’t hot enough mid-cook, like when a pot just won’t boil or your food isn’t searing, add a couple of logs to boost the heat.
If you're grilling, pull your food off the fire first to avoid flare-ups. Then give the logs a few minutes to catch, blacken, and burn past the smoky, big-flame stage before continuing to cook.
Let it burn down to lower the heat: For simmering, slow cooking, or gentle heat, let the fire burn down until you’re mostly working with glowing coals. You can also move logs aside or spread out the embers to reduce the intensity more quickly.
Create a heat management zone: Push burning logs to one side and pull hot coals toward your cooking area as needed. This setup gives you a steady supply of consistent heat from the coal bed, while the live fire continues producing more coals off to the side.
It’s ideal for longer cooks that need even, medium heat—like my fire-grilled spaghetti squash—check out the full article for step-by-step instructions with photos to see how this setup works in action.


Understanding Heat Zones (Direct vs. Indirect)
Control how your food cooks by using different heat zones. Whether you're searing sausages or simmering stew, placing your food in the right spot over the fire makes all the difference.
Direct Heat = Over the Flames
This zone is hot and fast, perfect for:
Searing steaks and burgers
Charring peppers or grilling asparagus
Quickly sautéing veggies like Brussels in a cast-iron pan
Flames are right beneath the food here, so things cook fast with great color and crisp edges. Keep an eye out to avoid burning.
Indirect Heat = Over the Coals
This gentler, even heat is ideal for:
Meats that need more time, like chicken or sausages
Simmering stews or beans in a pot
Cooking thicker veggies like squash, carrots, or potatoes
Off-Heat = Resting Zone
Furthest from the heat, this spot is great for:
Resting meats like ribs or chicken
Holding grilled veggies or potatoes while finishing other items
Keeping sauces warm without bubbling over
💡 Pro Tip: Build all three zones in one setup by piling logs to one side and spreading coals across the rest. You can keep adding logs to the live-fire side and replenish coals underneath the indirect zone as you cook.

Cooking in the Right Order Over a Campfire
Don’t try to cook everything at once. Fire cooking is way easier (and far less stressful) when you cook in stages. Some foods actually improve with a little rest time, and plenty of others reheat beautifully.
Here’s how I manage the order when cooking over a fire:
Start with the Slow-Cookers
These items take the longest to cook, so they go on first and can finish in the background while you prep the rest.
Corn in the husk: This takes 30+ minutes to cook and needs to rest before peeling, so you don’t burn your hands. Cook it early, then reheat briefly or finish with a quick char before serving to get grill marks.
🌽Check out my full guide on how to cook corn in the husk over fire for the full method and tips.
Dense veggies: Like potatoes, squash, and carrots, these can take a while to cook through. Start them early, then set aside and reheat just before serving.
Bone-in meats or pork ribs: These benefit from longer, indirect heat. Once done, they reheat beautifully over the coals or direct flame.
💡 Pro Tip: Most foods can be cooked 80–90% of the way and held off the heat, then quickly reheated just before serving. This works especially well when juggling multiple dishes or managing limited fire space.

Cook Proteins Early and Let Them Rest
Most meats benefit from resting. Fire cooking gives you the perfect chance to get them done early, then bring them back to temp when it’s time to eat.
Steaks: Cook and rest, then reheat for 30–60 seconds over direct heat before slicing or serving. This gives you more tender meat with evenly redistributed juices.
Chicken: One of my favorite things to make ahead. Once it’s fully cooked, wrap it in foil and let it rest off the heat. The foil traps steam and keeps it juicy and hot for a long time—no need to time it perfectly.
Sausages: I like to cook sliced onions first in a grill basket, then set them aside in foil. Next, I cook the sausages and let them rest on top of the onions while I toast the buns. It’s all perfectly warm and flavorful by the time you’re ready to assemble.

Finish with the Fast-Cookers
Some ingredients are best served hot and fresh. Cook them last for the best texture and flavor.
Eggs: If you're making breakfast, toast your bread first, then cook the bacon (wrap in foil to keep warm), then make your eggs so they’re hot and fresh, not rubbery or overdone.
Flatbreads, halloumi, and tomatoes: These need just a few minutes over high heat. Cooking them last helps avoid burning or drying out.
Delicate veggies: Like asparagus or zucchini, these can get mushy fast, especially if wrapped in foil to stay warm. Grill them just before serving and enjoy while they’re fresh for the best texture.

Easy Food Ideas to Cook Over a Fire
Grill-Friendly Mains & Sides
These dishes are perfect for your grill rack or basket. They’re easy to make and pick up lots of smoky flavor from the fire.
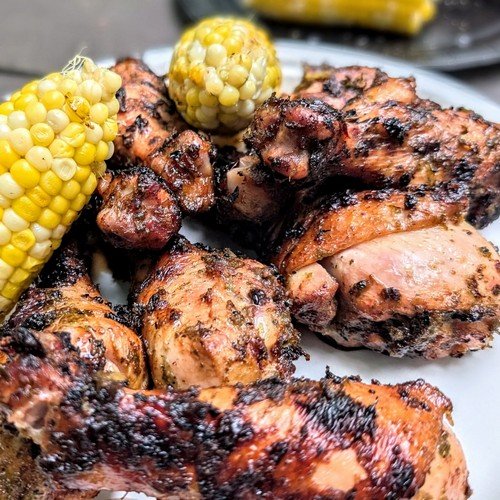
Meats: Try this fire-grilled flank steak, rested in a foil packet with garlic, herbs, and butter—or go with jerk-marinated chicken drumsticks for a bold, spicy kick. Both are great cooked ahead and left to rest.
If you’ve got more time, try these BBQ pork ribs with Carolina-style vinegar sauce. Let them cook low and slow by the fire, then finish over high heat in a grill basket to caramelize the sauce.
Veggies: Go for classics that grill well, like bell peppers, zucchini, red onions, mushrooms, or asparagus. If you spot a farm stand on your way to camp, grab whatever’s fresh. Corn on the cob is especially good grilled right in the husk, locking in moisture while picking up a little smoke from the fire.
Starches: Switch things up from foil-wrapped baked potatoes with these buttered campfire potato wedges—charred and crispy on the outside and fluffy on the inside. Or, take garlic bread to the next level with this cheese-stuffed grilled garlic bread, loaded with gooey, melty cheese, herbs, and confit garlic. (Note: Easier to assemble at home and stash in the cooler—then just grill to finish at camp!)

One-Pot Meals Over the Fire
For low-effort comfort food, one-pot dishes are the way to go. Simmer everything together over steady heat for a meal that’s simple, cozy, and satisfying.
Pasta dishes: You can cook the pasta right in the sauce for an easy one-pot dinner, like in this creamy chicken pesto fettuccine or bison and mushroom bolognese with tagliatelle.
Hearty stews: To make life easy, prep a big pot at home and simply reheat it at camp. Try this chunky beef chili con carne with tender braised beef and smoky Mexican spices. (This one can feed a crowd!)
Polenta, oatmeal, or risotto: These cook gently and hold heat well if you want to set them aside until it’s time to eat. Try this creamy campfire polenta with fresh corn, it’s silky, cheesy, and perfect as a side or a comforting main dish.

Cast-Iron Skillet Ideas
Skillet cooking gives you more control and even heat than grilling directly over flames. It’s perfect for small ingredients, saucy dishes, or anything you want nicely seared.
Smash burger tacos: One of my favorite easy one-pan meals. Smash ground beef directly onto a tortilla and sear in a hot skillet until both sides are crispy and golden, then load it up with your favorite toppings. Try this Tex-Mex smash burger taco variation.
Fajitas on the fire: Pre-marinate your meat and veggies at home, stash them in the cooler, then sizzle them up in your skillet at camp. Serve with warmed tortillas and classic fixings. Check out my easy mushroom fajitas recipe, with a homemade citrusy, smoky marinade.
Sautéed Veggies: For small or delicate vegetables that might fall through the grate, the skillet is your best friend. Try these campfire Brussels sprouts cooked in bacon fat with mushrooms and onions, for a savory side that also reheats well if made ahead.

FAQs
What's the best wood to use for campfire cooking?
The best wood for campfire cooking is any dry hardwood like oak, hickory, maple, or ash. These woods burn hot and steady, producing great coals and minimal smoke. Avoid softwoods like pine or spruce, which can spark and smoke heavily due to sap, and skip freshly cut logs that haven’t had time to dry out.
How do I know when my fire is ready for cooking?
Your fire is ready for cooking when the flames have mostly settled and you're left with a glowing bed of red-hot coals and fully blackened logs. Look for small, steady flames—not big flare-ups with lots of smoke. This stage can take up to an hour, depending on your wood and fire setup.
How do I cook on a campfire without a grill?
To cook on a campfire without a grill, use a portable rack, a tripod with a hanging pot or grate, or cook directly in the coals with a cast iron pot or Dutch oven. Campfire forks and skewers are also great for simple items like sausages, hot dogs, or marshmallows.
Is it safe to cook with foil over the fire?
Cooking with foil over a fire is safe when used with low to moderate heat and non-acidic foods. I don’t recommend placing foil-wrapped food directly in high flames, as aluminum can degrade at extreme temperatures and leach metal into your food. For extra safety, wrap food in parchment paper before the foil to avoid direct contact.
Can you use stainless steel pans rather than cast-iron on a campfire?
Yes, you can use stainless steel pans on a campfire, but stick with heavy-bottomed ones for best results. Thin stainless steel can warp, discolor, or create hot spots over open flames. Cast iron is still the most forgiving and reliable for consistent heat.
What’s the easiest meal to make over a campfire for beginners?
The easiest campfire meals for beginners are simple, low-stress options that don’t require juggling multiple items. Grilled sausages, fire-roasted corn in the husk, or classic baked potatoes are all great starting points while you get comfortable building and managing a cooking fire.

Ready to Start Campfire Cooking?
I’ve cooked over fire pits all across North America, and you’ll almost never catch me using a camp stove (we don’t even own one!). That smoky flavor you get from real fire is what outdoor cooking is all about.
Like any skill, live fire cooking gets easier (and more fun) the more you do it. You’ll start to recognize when the heat’s just right, how long things take to cook, and what meals fit your setup best.
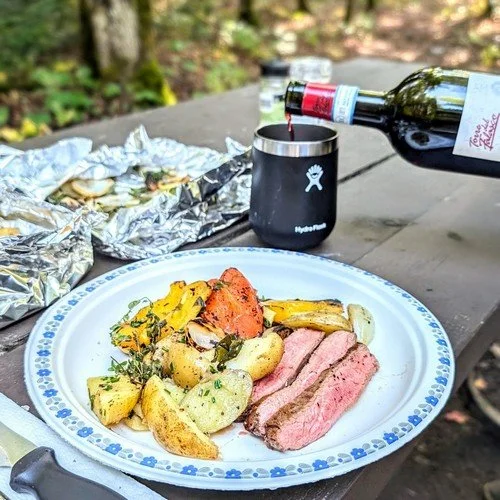
Having someone to help out makes the whole process even smoother—whether it’s a partner, a friend, or one of the kids jumping in. My husband and I have our rhythm down by now: he builds the fire while I prep the food, and by the time everything’s ready, the fire’s perfect for cooking and he’s setting the table and pouring some wine 😉🍷
So grab your gear, rally your crew, and get ready to cook something delicious over a wood-burning fire!

Have you tried cooking over a wood-burning fire?
I’d love to hear how it went—or do you usually bring a camp stove instead? Drop a comment below and let me know. If you have any questions, I’m happy to help!
More Campfire Cooking Resources
My essential campfire cooking equipment: Everything I actually pack to make the recipes you see on the blog—plus a few fun extras that make fire cooking even better.
Delter coffee press review and camp brewing guide: My go-to method for real coffee at camp. Includes my full review, brewing tips, cleaning instructions, and where to buy it.